1、cloudify-manager-blueprints:https://github.com/cloudify-cosmo/cloudify-manager-blueprints/tree/3.1-build可以选择simple或者openstack-nova-net版本(需要调整)。cloudify-nodecellar-example:https://github.com/cloudify-cosmo/cloudify-nodecellar-example2、手把手安装Cloudify 3.1:http://www.oschina.net/question/2241484_233747Cloudify3.1环境搭建和插件集成:http://www.oschina.net/question/2355760_2369353、cloudify主要帮助文档:http://getcloudify.org/guide/3.1/quickstart.htmlhttp://getcloudify.org/guide/3.1/quickstart-openstack.htmlhttp://getcloudify.org/guide/3.1/plugin-openstack.htmlhttp://getcloudify.org/guide/3.2/getting-started-write-blueprint.htmlhttp://docs.getcloudify.org/3.3.1/blueprints/overview/cloudify-hello-world-example:https://github.com/cloudify-cosmo/cloudify-hello-world-example1、安装Cloudify CLImkdir cloudifyapt-get install python-pip -yapt-get install python-dev -ypip install cloudify==3.1cfy --versionCloudify CLI 3.1.0 (build: 85, date: )===========================================================CentOS7.1安装:http://docs.getcloudify.org/3.3.1/installation/from-packages/centos7 关闭firewall安装iptables并配置:http://linux.it.net.cn/CentOS/fast/2015/0110/11567.htmlyum install python-pip -ysudo rpm -i cloudify-centos-Core-cli-3.3.1-sp_b310.x86_64.rpmsource /opt/cfy/env/bin/activatecfy --version2、安装Cloudify Managerapt-get install git -ygit clone https://github.com/cloudify-cosmo/cloudify-manager-blueprintscd cloudify-manager-blueprintsgit checkout tags/3.1或者:wget https://github.com/cloudify-cosmo/cloudify-manager-blueprints/archive/3.1-build.zipcfy init下载必备软件包:cloudify-manager-pkgs/,修改simple.yaml软件包为NGINX本地路径(http://10.5.24.13/static)cp inputs.json.template inputs.json修改inputs.json入参chmod 400 sys_automation.datcfy local create-requirements -o requirements.txt -p simple.yamlsudo pip install -r requirements.txtcfy bootstrap -p simple.yaml -i inputs.jsoncd /opt/cloudify-ui/node_modules/cosmo-uinohup node cosmoui.js >/dev/null 2>&1 &cfy use -t 10.5.24.12cfy status=============================================================CentOS7.1安装:http://docs.getcloudify.org/3.3.1/manager/prerequisites/yum install lrzsz -y准备simple-manager-blueprint.yaml本地软件包、simple-manager-blueprint-inputs.yaml输入资源cfy initcfy bootstrap --install-plugins -p simple-manager-blueprint.yaml -i simple-manager-blueprint-inputs.yamlbootstrapping completemanagement server is up at 10.5.24.124cfy use -t 10.5.24.124cfy statusGetting management services status... [ip=10.5.24.124]Services:+--------------------------------+---------+| service | status |+--------------------------------+---------+| InfluxDB | running || Celery Management | running || Logstash | running || RabbitMQ | running || AMQP InfluxDB | running || Manager Rest-Service | running || Cloudify UI | running || Webserver | running || Riemann | running || Elasticsearch | running |+--------------------------------+---------+安装cloudify-blueprint-composer:http://docs.getcloudify.org/3.3.1/composer/installation/sudo rpm -Uvh cloudify-blueprint-composer-3.3.0-ga-b300.rpm3、基本功能体验git clone https://github.com/cloudify-cosmo/cloudify-nodecellar-example上传工作流:cfy blueprints upload -b monitor -p openstack.yaml部署工作流:cfy deployments create -b monitor -d monitor --inputs inputs.json执行工作流:cfy executions start -w install -d monitor安装GCC:yum install gcc -yyum install python-devel -ymkdir -p ~/.pip/vi ~/.pip/pip.conf[global]timeout = 600index-url = http://10.6.48.4:8080/simpletrusted-host = 10.6.48.4extra-index-url = https://pypi.python.org/simple4、与OpenStack对接Openstack Configuration:http://getcloudify.org/guide/3.1/plugin-openstack.html5、Cloudify API文档:http://docs.getcloudify.org/api/#cloudify-rest-api-v2http://10.5.24.12/api/spec.html#!/spec.json/list_0_16、参考资料:手把手安装Cloudify 3.1:http://www.oschina.net/question/2241484_233747?fromerr=Py51zWhoCloudify3.1环境搭建和插件集成:http://www.oschina.net/question/2355760_236935?fromerr=lXJRj7mt工作流定义语法:http://getcloudify.org/guide/3.1/dsl-spec-outputs.html用graphite diamond做监控:http://my.oschina.net/duoduo3369/blog/338142Python性能监控Graphite:http://www.mincoder.com/article/5074.shtml使用Grafana+Diamond+Graphite构造完美监控面板:http://www.tuicool.com/articles/Ff6fIfnrabbitmq启动失败:http://stackoverflow.com/questions/25816918/not-able-to-start-rabbitmq-server-in-centos-7-using-systemctl使用 Grafana+collectd+InfluxDB 打造现代监控系统:http://www.tuicool.com/articles/VBZvIri
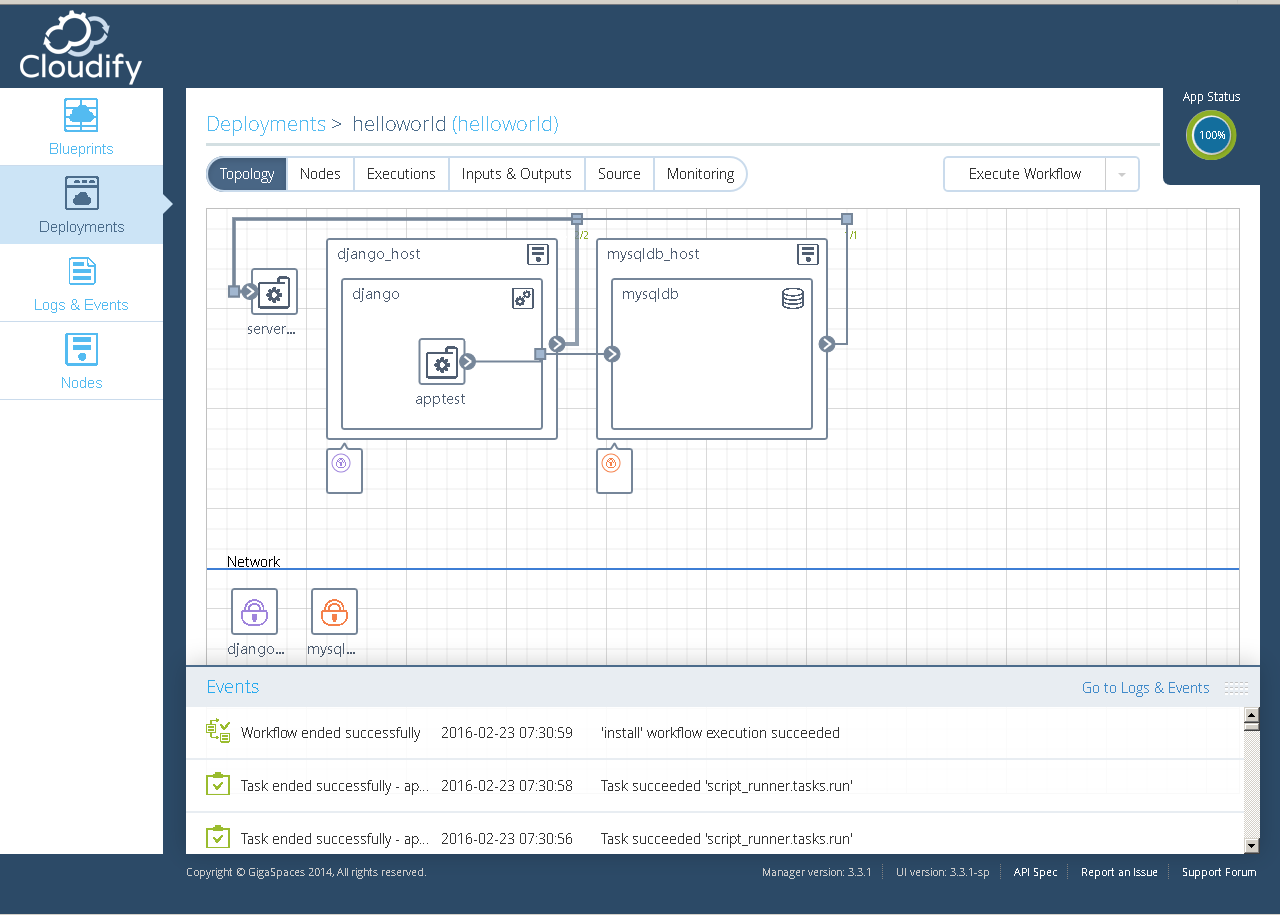
我搭建的3.3版本,openstack nova-net的MySQL+Django应用示例如下:
